What is Windshield ADAS Calibration? Windshield ADAS calibration is actually recalibrating the camera mounted on the windshield. The ADAS system senses the changes in the surrounding environment through the camera sensor during the driving process of the auto, so as to make analysis and judgment. In this blog, we will discuss what is windshield ADAS calibration. Why Windshield ADAS Calibration? And the final example shows!
With the continuous advancement of automotive technology on the market, the windshield is more than just a piece of glass. New model autos are equipped with advanced driver assistance systems(ADAS), and other devices such as cameras and sensors are installed on the windshield. Windshield ADAS (Advanced Driver Assistance System) calibration is a process that involves adjusting and aligning the various sensors and cameras that are installed in the windshield of a vehicle.
ADAS is a system that assists drivers in their decision-making by providing them with real-time information about the vehicle's surroundings. When replacing the windshield, the camera is removed and reattached. Even if the angle of the camera deviates by only one degree. It can also have a huge impact on the visible area of the vehicle, which affects how the ADAS system works.
When the ADAS windshield is replaced, subjected to a collision, intentional damage, severe weather, etc., as long as it leaves the original position, the ADAS cannot perform self-recalibration. Since the sensors and cameras used in ADAS systems rely on precise measurements and calculations, they need to be calibrated properly to ensure accurate and reliable performance. This calibration process involves setting up the vehicle in a specific location, aligning the sensors and cameras according to manufacturer specifications, and verifying that the readings are within the required range. This is why windshield ADAS calibration is required!
There are two types of ADAS calibrations: static calibration and dynamic calibration. Static calibration is performed when the vehicle is stationary, and dynamic calibration is performed while the vehicle is in motion. The type of calibration required depends on the specific ADAS system in the vehicle.
It is important to note that windshield ADAS calibration is a highly technical process and should only be performed by trained and qualified professionals. Improper calibration can lead to false readings, which can compromise the effectiveness of the ADAS system and, in some cases, can even create a safety hazard.
Using professional ADAS calibration equipment can restore the correct position of the car's windshield camera. The recalibration of the camera on the windshield allows the ADAS safety system to work properly. Windshields are not ADAS calibrated, and ADAS functions may not work properly, resulting in accidents. This includes ADAS system functions such as Forward Collision Alert (FCA), Driver Status Monitoring (DSM), Lane Departure Warning (LDW), Pedestrian Detection (PD), Blind Spot Monitoring (BSM), Parking Assist (PA), etc.
Windshield ADAS calibration is required in the following situations:
We will show you the case!
Required products: X-431 ADAS Mobile, iSmartLink 801
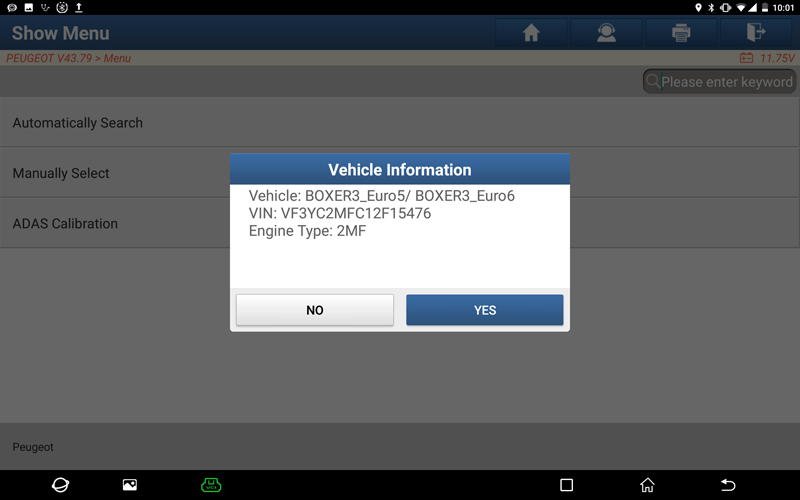
Measured model: BOXER3_Euro 5 | Euro 6
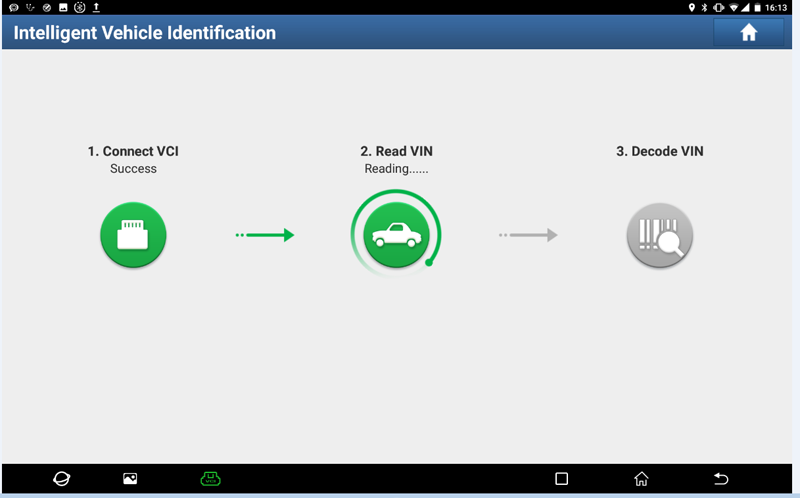
1. Automatically identify and enter through ADAS calibration entrance VIN
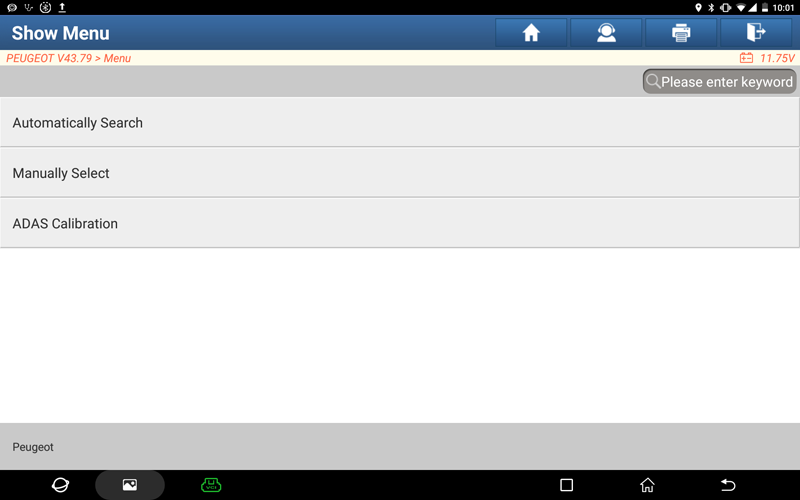
2. Choose “ADAS Calibration"
3. Automatically recognize BOXER3_Euro 5 | Euro 6 models
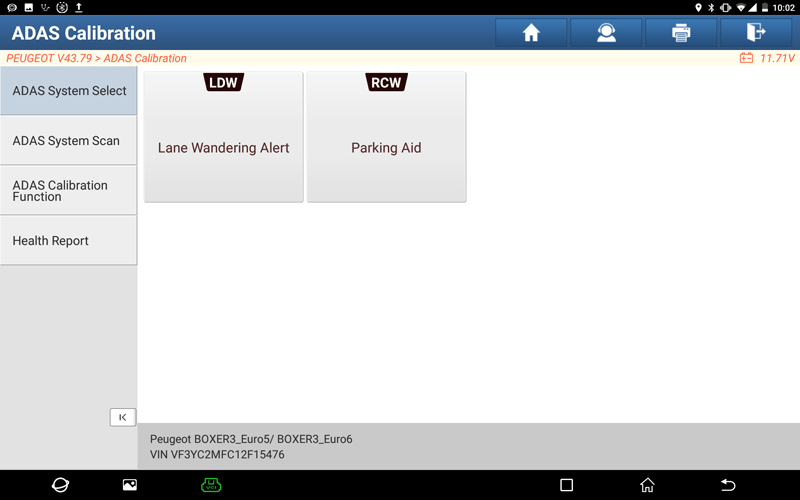
4. After selecting "ADAS System Select", click "Lane Wandering Alert" to enter the system
5. Select the path: Special Function->ADAS Calibration, and click to enter
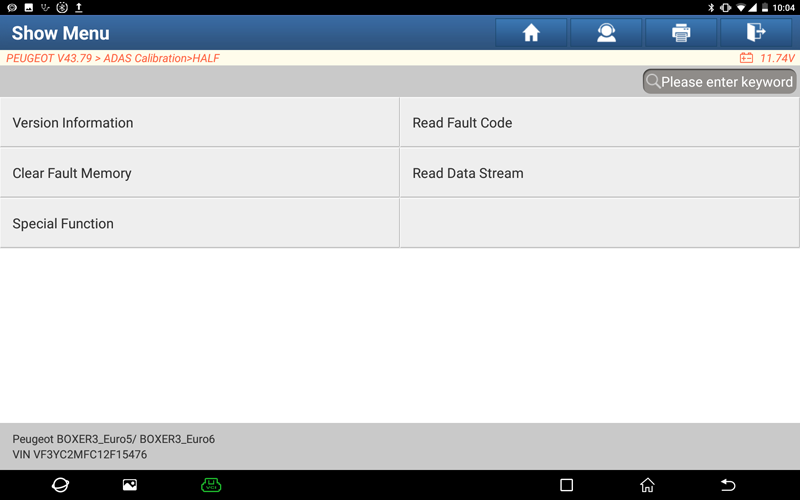
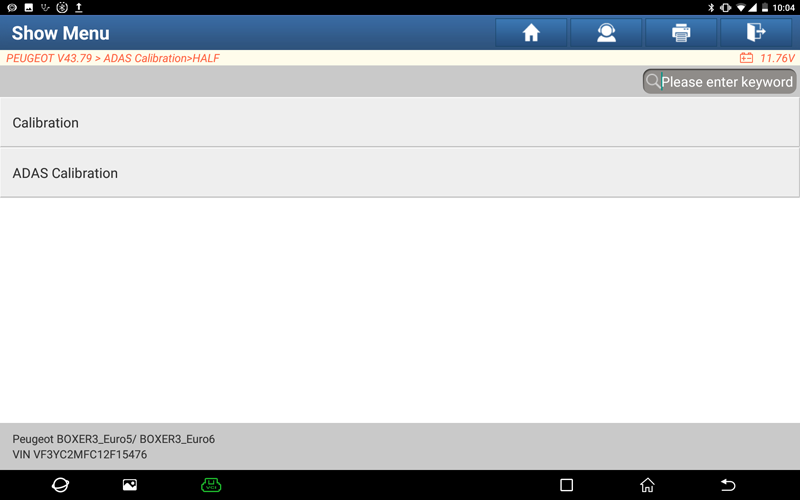
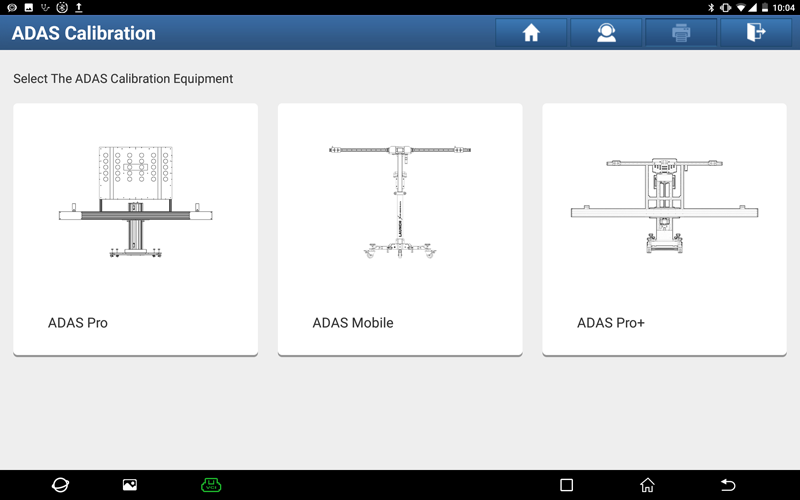
6. Select the “ADAS mobile“ target, read the prompt, and click "OK" when you are ready
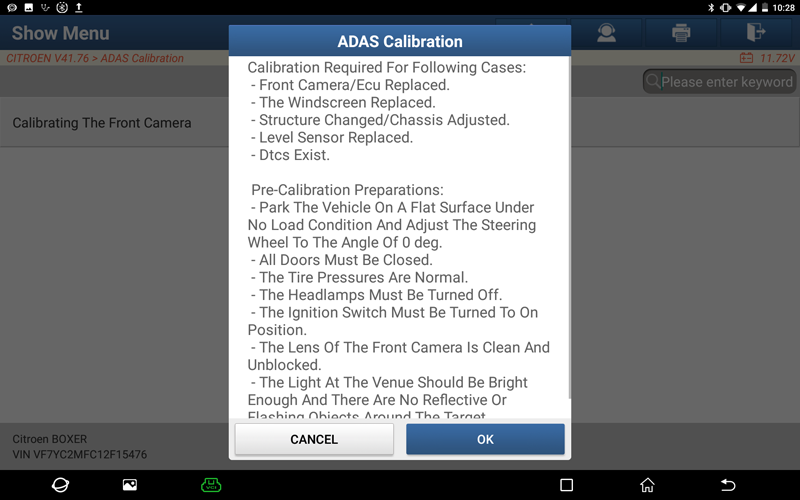
7. Follow the prompts. After the operation is complete, click "Next"
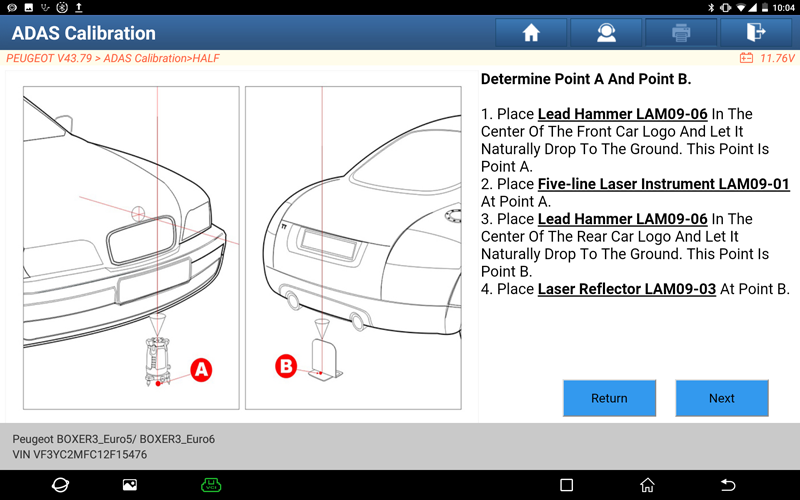
8. Follow the prompts. After the operation is complete, click "Next"
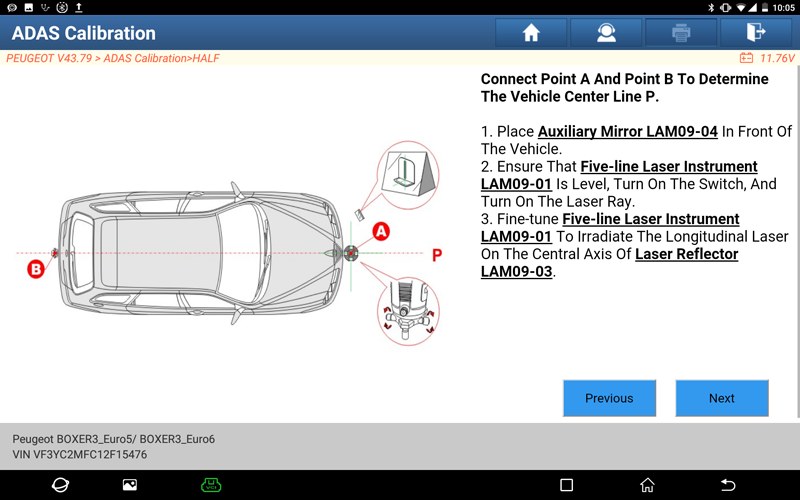
9. Follow the prompts. After the operation is complete, click "Next"
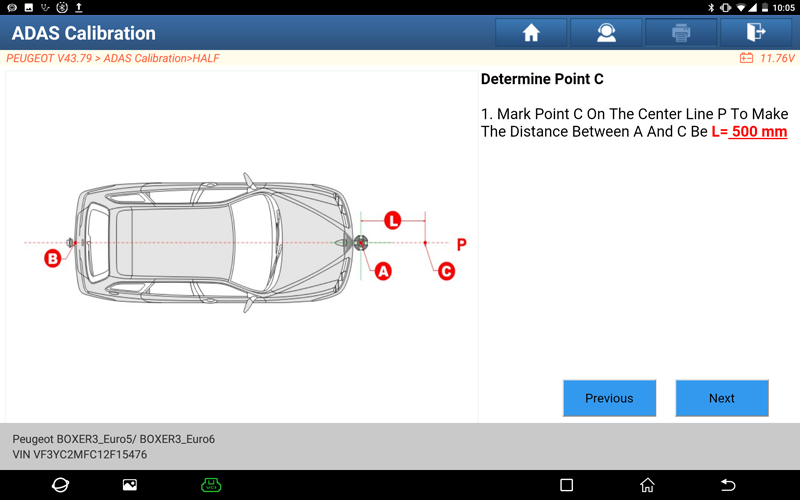
10. Follow the prompts. After the operation is complete, click "Next"
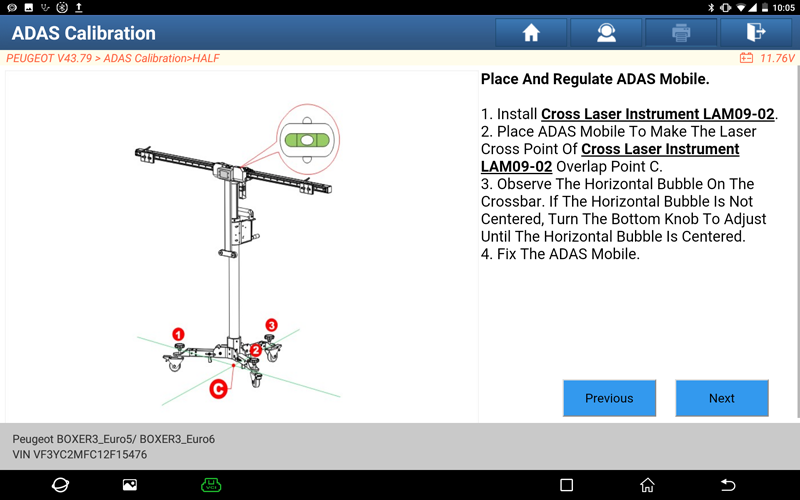
11. Follow the prompts. After the operation is complete, click "Next"
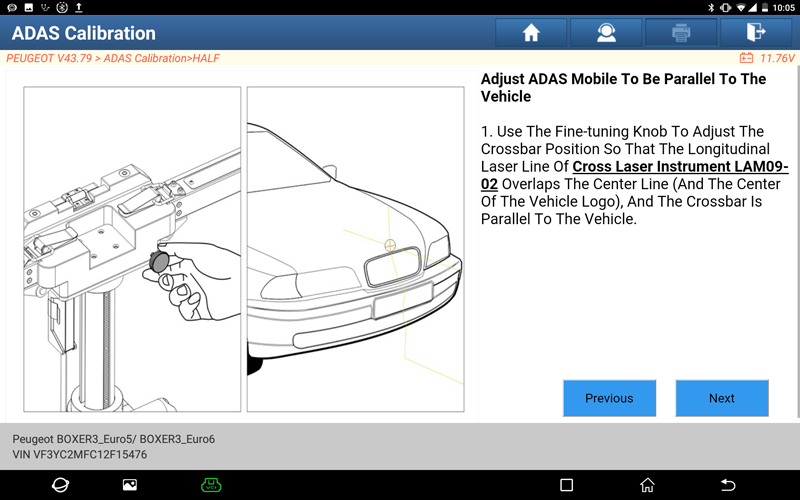
12. Follow the prompts. After the operation is complete, click "Next"
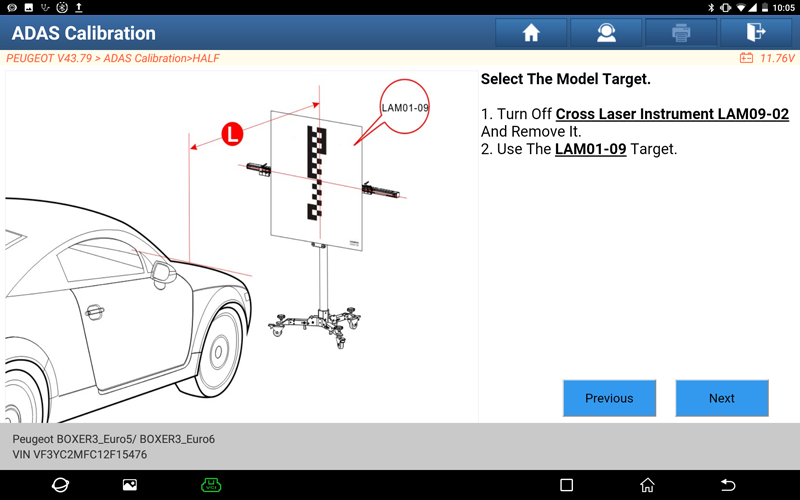
13. Follow the prompts. After the operation is complete, click "Next"
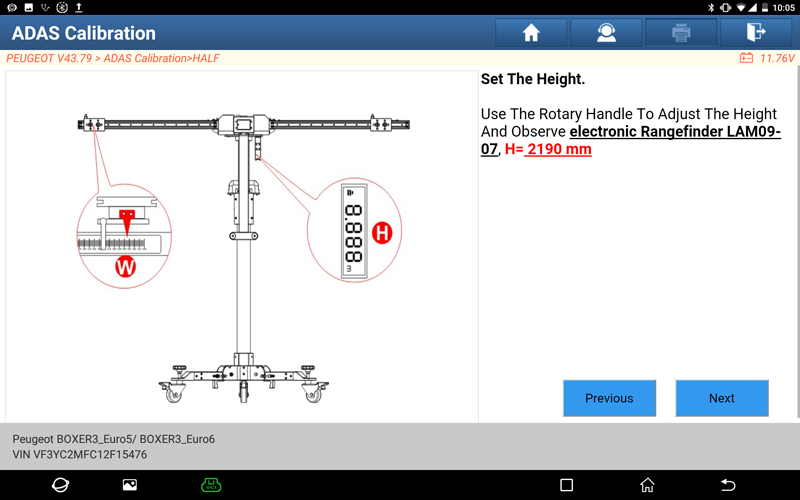
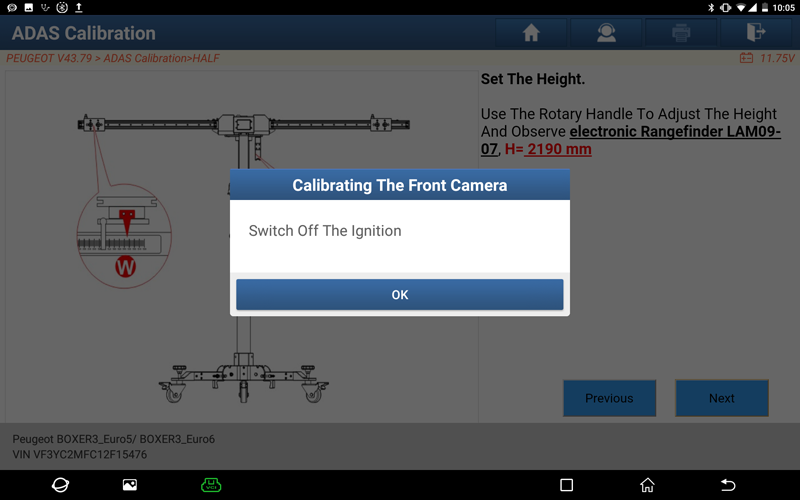
14. Follow the prompts, after finishing the operation, click "Next" to perform the calibration function, after "Switch Off The Ignition" the prompt appears, and then click "OK"
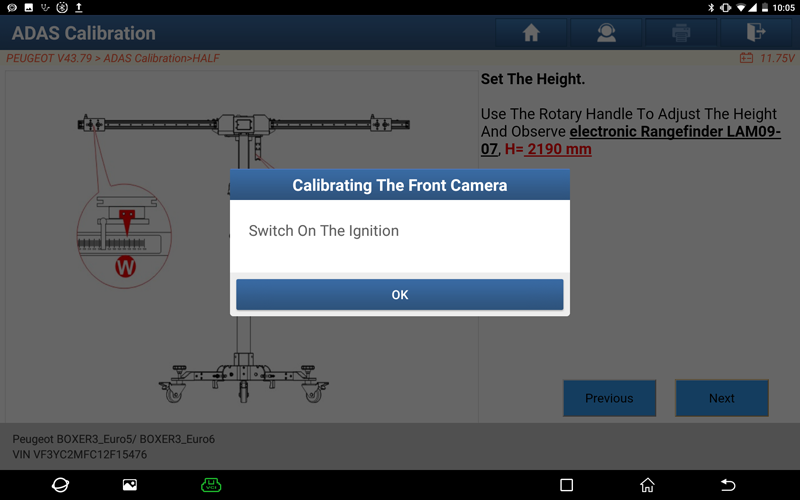
15. After "Switch On The Ignition" according to the prompt, click "OK"
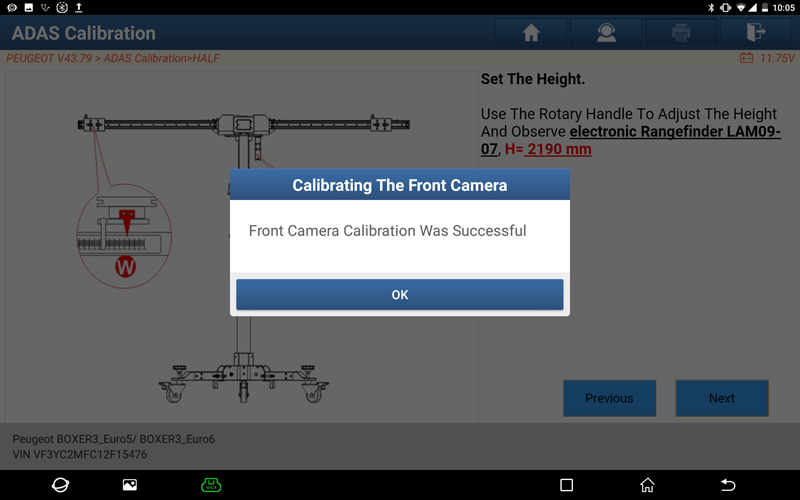
16. Show prompt "Front Camera Calibration Was Successful", click "OK"
Return